
Postfixを使ってGmailアカウントのメールを送る [Server software]
サーバーでPostfixを動かして、自分のGmailアカウントのメールを送るための設定です。
これでローカルでroot宛てに届いたメールをGmailアカウント宛てに転送することもできます。
Zabbixのアラートメールも送れます。
まずは、Postfixのインストールから。ちなみに、サーバーはUbuntu11.10
# apt-get install postfix
Gmailでメールを送るためには、TLS/SSLが必要なので、sasl2-binもインストール。
# apt-get install sasl2-bin
次に設定。
# vi /etc/postfix/main.cf
--
# See /usr/share/postfix/main.cf.dist for a commented, more complete version
# Debian specific: Specifying a file name will cause the first
# line of that file to be used as the name. The Debian default
# is /etc/mailname.
myorigin = localhost.localdomain
smtpd_banner = $myhostname ESMTP $mail_name (Ubuntu)
biff = no
# appending .domain is the MUA's job.
append_dot_mydomain = no
# Uncomment the next line to generate "delayed mail" warnings
delay_warning_time = 1h
readme_directory = no
# TLS parameters
smtpd_tls_cert_file=/etc/ssl/certs/ssl-cert-snakeoil.pem
smtpd_tls_key_file=/etc/ssl/private/ssl-cert-snakeoil.key
smtpd_tls_session_cache_database = btree:${data_directory}/smtpd_scache
smtp_tls_session_cache_database = btree:${data_directory}/smtp_scache
smtp_use_tls=yes
# See /usr/share/doc/postfix/TLS_README.gz in the postfix-doc package for
# information on enabling SSL in the smtp client.
myhostname = ws # サーバー名に書き換えます
alias_maps = hash:/etc/aliases
alias_database = hash:/etc/aliases
mydestination = ws, localhost.localdomain, localhost # サーバー名を追記
relayhost = [smtp.gmail.com]:587
mynetworks = 127.0.0.0/8 [::ffff:127.0.0.0]/104 [::1]/128
mailbox_size_limit = 0
recipient_delimiter = +
inet_interfaces = localhost
home_mailbox = Maildir/
smtp_sasl_auth_enable = yes
smtp_sasl_password_maps = hash:/etc/postfix/sasl_auth
smtp_sasl_security_options = noanonymous
smtp_sasl_tls_security_options = noanonymous
smtp_sasl_mechanism_filter = plain
relay_domains = gmail.com
smtpd_recipient_restrictions = permit_auth_destination,reject
--
sasl_auth を新たに作成します。Gmailアカウントの設定です。
# vi /etc/postfix/sasl_auth
--
[smtp.gmail.com]:587 example@gmail.com:password
--
パスワードファイルの読み書き権限を変更します。
# chmod 600 /etc/postfix/sasl_auth
パスワードファイルをハッシュ化します。
# postfix /etc/postfix/sasl_auth
最近のpostfixでは、postfixコマンドの代わりに、postmapコマンドを使うようです。(2013/9/16追記)
これで、/etc/postfix/sasl_auth.dbが作成されたはずです。
# service postfix restart
これでおわり。
root宛てのメールをexample@gmail.com宛てに転送する設定は/etc/aliasesから。
# vi /etc/aliases
--
root: example@gmail.com
--
ハッシュ化。
# newaliases
これで送れるはずですが。。
ところで、ログが、/var/log/syslogと/var/log/mail.log両方に同じものがはかれているので、設定を変更します。
# vi /etc/rsyslog.d/50-default.conf
--(変更前)
(略)
*.*;auth,authpriv.none -/var/log/syslog
(略)
--
↓
--(変更後)
(略)
*.*;mail,auth,authpriv.none -/var/log/syslog
(略)
--
# service rsyslog restart
Done!
タグ:リレー
NFSサーバーをインストールする [Server software]
Zabbix serverが入っているサーバーが ubuntu 10.04に上げてからよく落ちる。
ログを見てもよくわからず、仕方ないので、10.04をきれいに入れ直してみることに。
その際、設定ファイルやらをバックアップするのに、ファイルサーバーにNFSを
入れてみた。
sambaでもLinux同士の共有ができるらしいですが、
# mount -t cifs 192.168.1.10:/st1/nao /media/fs
とかしても、
mount: wrong fs type, bad option, bad superblock on 192.168.1.10:/st1/nao,
missing codepage or helper program, or other error
(for several filesystems (e.g. nfs, cifs) you might
need a /sbin/mount.<type> helper program)
In some cases useful info is found in syslog - try
dmesg | tail or so
こんな具合に怒られるので、昔懐かしいNFSで共有することに。
ファイルサーバー側で
# apt-get install nfs-kernel-server
nfs-user-server版はメンテされていないようなので、kernel-server版で。
# vi /etc/exports
で下記を追記。
/st1/nao 192.168.1.0/255.255.255.0(rw,async,no_root_squash,no_subtree_check)
"no_root_squash"を入れないと、共有したときに権限関係で面倒なことになったので、
入れることに。
# /etc/init.d/nfs-kernel-server restart
# showmount -e localhost
Export list for localhost:
/st1/nao 192.168.1.0/255.255.255.0
となればOK
クライアント側は、
# apt-get install nfs-common
# mount -t nfs 192.168.1.10:/st1/nao /media/fs
これで、OK ![[るんるん]](https://blog.ss-blog.jp/_images_e/146.gif)
ubuntu 9.10 から 10.04 へアップグレードすると。。。 [Server software]
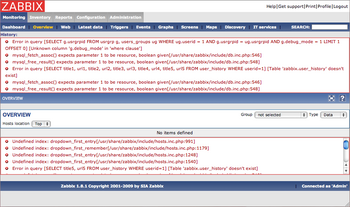
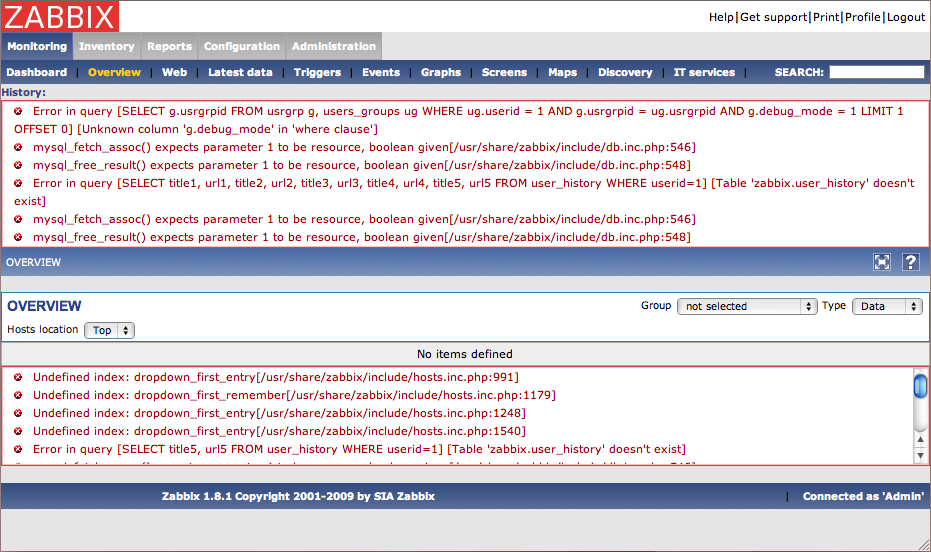
zabbix sever が大変なことになっています![[たらーっ(汗)]](https://blog.ss-blog.jp/_images_e/163.gif)
ま、これはおいおい直すとして、、
/etc/init.d/samba あたりがよくわからないことになっています。
そのあたりだけ抜粋しますと。。
$ ls -la /etc/init.d
lrwxrwxrwx 1 root root 21 2010-05-10 18:31 nmbd -> /lib/init/upstart-job
-rwxr-xr-x 1 root root 3011 2010-03-11 01:57 samba.dpkg-bak
lrwxrwxrwx 1 root root 21 2010-05-10 18:31 smbd -> /lib/init/upstart-job
もともとあった、sambaはなぜか過去の日付でsamba.dpkg-bakにリネームされ、
あらたに、nmbdとsmbdが追加され、妙なところへのシンボリックリンクとなっている
模様。
どうやら、以前から、Debian系もsysvinitからupstartへの移行が進んでいる模様です。
ubuntu 10.04からはsambaもこの波に巻き込まれて、upstartから起動することに
なっているようです。
そのため、/etc/init.d/samba が廃止され、upstartから起動するデーモン類は
/etc/init/*.conf にそれぞれ書くことになります。
sambaであれば、
/etc/init/smbd.conf
/etc/init/nmbd.conf
sambaをソースからmakeしてインストールした場合は、実行ファイルの場所が異なり
ますので、書き換えが必要です。
# vi /etc/init/smbd.conf
description "SMB/CIFS File Server"
author "Steve Langasek <steve.langasek@ubuntu.com>"
start on local-filesystems
stop on runlevel [!2345]
respawn
pre-start script
RUN_MODE="daemons"
[ -r /etc/default/samba ] && . /etc/default/samba
[ "$RUN_MODE" = inetd ] && { stop; exit 0; }
install -o root -g root -m 755 -d /var/run/samba
end script
#exec smbd -F
exec /usr/local/samba/sbin/smbd -F
nmbdも同様。
ちなみに、upstartでは、デーモンの起動・停止なども
# start smbd
# stop smbd
と、簡単になりました。
これでソースからビルドしたsamba3.5.2もubuntu 10.04で動くようになりました。
ちなみに、同じくソースからビルドしたnetatalk2.1については、特に問題なく、
おそらく、netatalkはapt-getで2.0.x系をインストールしていないので、
アップグレードの影響を受けなかったのだと思います。。
AVAHI でFinderからsambaも検出させる [Server software]
Finderからnetatalkを検出させるのに、avahiをつかっていましたが、
同様に。
netatalk用
/etc/avahi/services/afpd.service
<?xml version="1.0" standalone='no'?>
<!DOCTYPE service-group SYSTEM "avahi-service.dtd">
<service-group>
<name replace-wildcards="yes">%h-afp</name>
<service>
<type>_afpovertcp._tcp</type>
<port>548</port>
</service>
</service-group>
samba用
/etc/avahi/services/smb.service
<?xml version="1.0" standalone='no'?><!--*-nxml-*-->
<!DOCTYPE service-group SYSTEM "avahi-service.dtd">
<service-group>
<name replace-wildcards="yes">%h-cifs</name>
<service>
<type>_smb._tcp</type>
<port>139</port>
</service>
</service-group>
<name replace-wildcards="yes">%h-afp</name>
<name replace-wildcards="yes">%h-cifs</name>
ここを変えてあげるとFinderから見てわかりやすい。
sambaかnetatalk、こんがらがることもありません。
nao さん

-
nice! 59
記事 248
テーマ パソコン・インターネット (18位)
プロフィール
ブログを紹介する


