SSブログ
エステ
Linux コマンド・設定 Memo ブログトップ

UUIDの調べ方 [Linux コマンド・設定 Memo]

最近のfstabはUUIDで指定するので、便利だけれども、mount pointを追加するときには、UUIDをいちいち調べないといけない。

ls -l /dev/disk/by-uuid | grep md0

lrwxrwxrwx 1 root root  9 Dec 17 00:24 6f72b6e1-0ea5-401f-88fc-78a2c12a2938 -> ../../md0

このUUIDを/etc/fstabに追記してあげるとよい。

UUID=6f72b6e1-0ea5-401f-88fc-78a2c12a2938       /st     ext4    errors=remount-ro       0       1

とか。 


毎回CD入れろといわれるので。。 [Linux コマンド・設定 Memo]

Debian7.0をインストールしましたが、apt-get install のたびに、
 
Media change: please insert the disc labeled
 'Debian GNU/Linux 7.0.0 _Wheezy_ - Official amd64 CD Binary-1 20130504-14:44'
in the drive '/media/cdrom/' and press enter
 
といわれるので、 
 
# vi /etc/apt/sources.list
 
 
deb cdrom:[Debian GNU/Linux 7.0.0 _Wheezy_ - Official amd64 CD Binary-1 20130504-14:44]/ wheezy main
 
行をコメント化。 

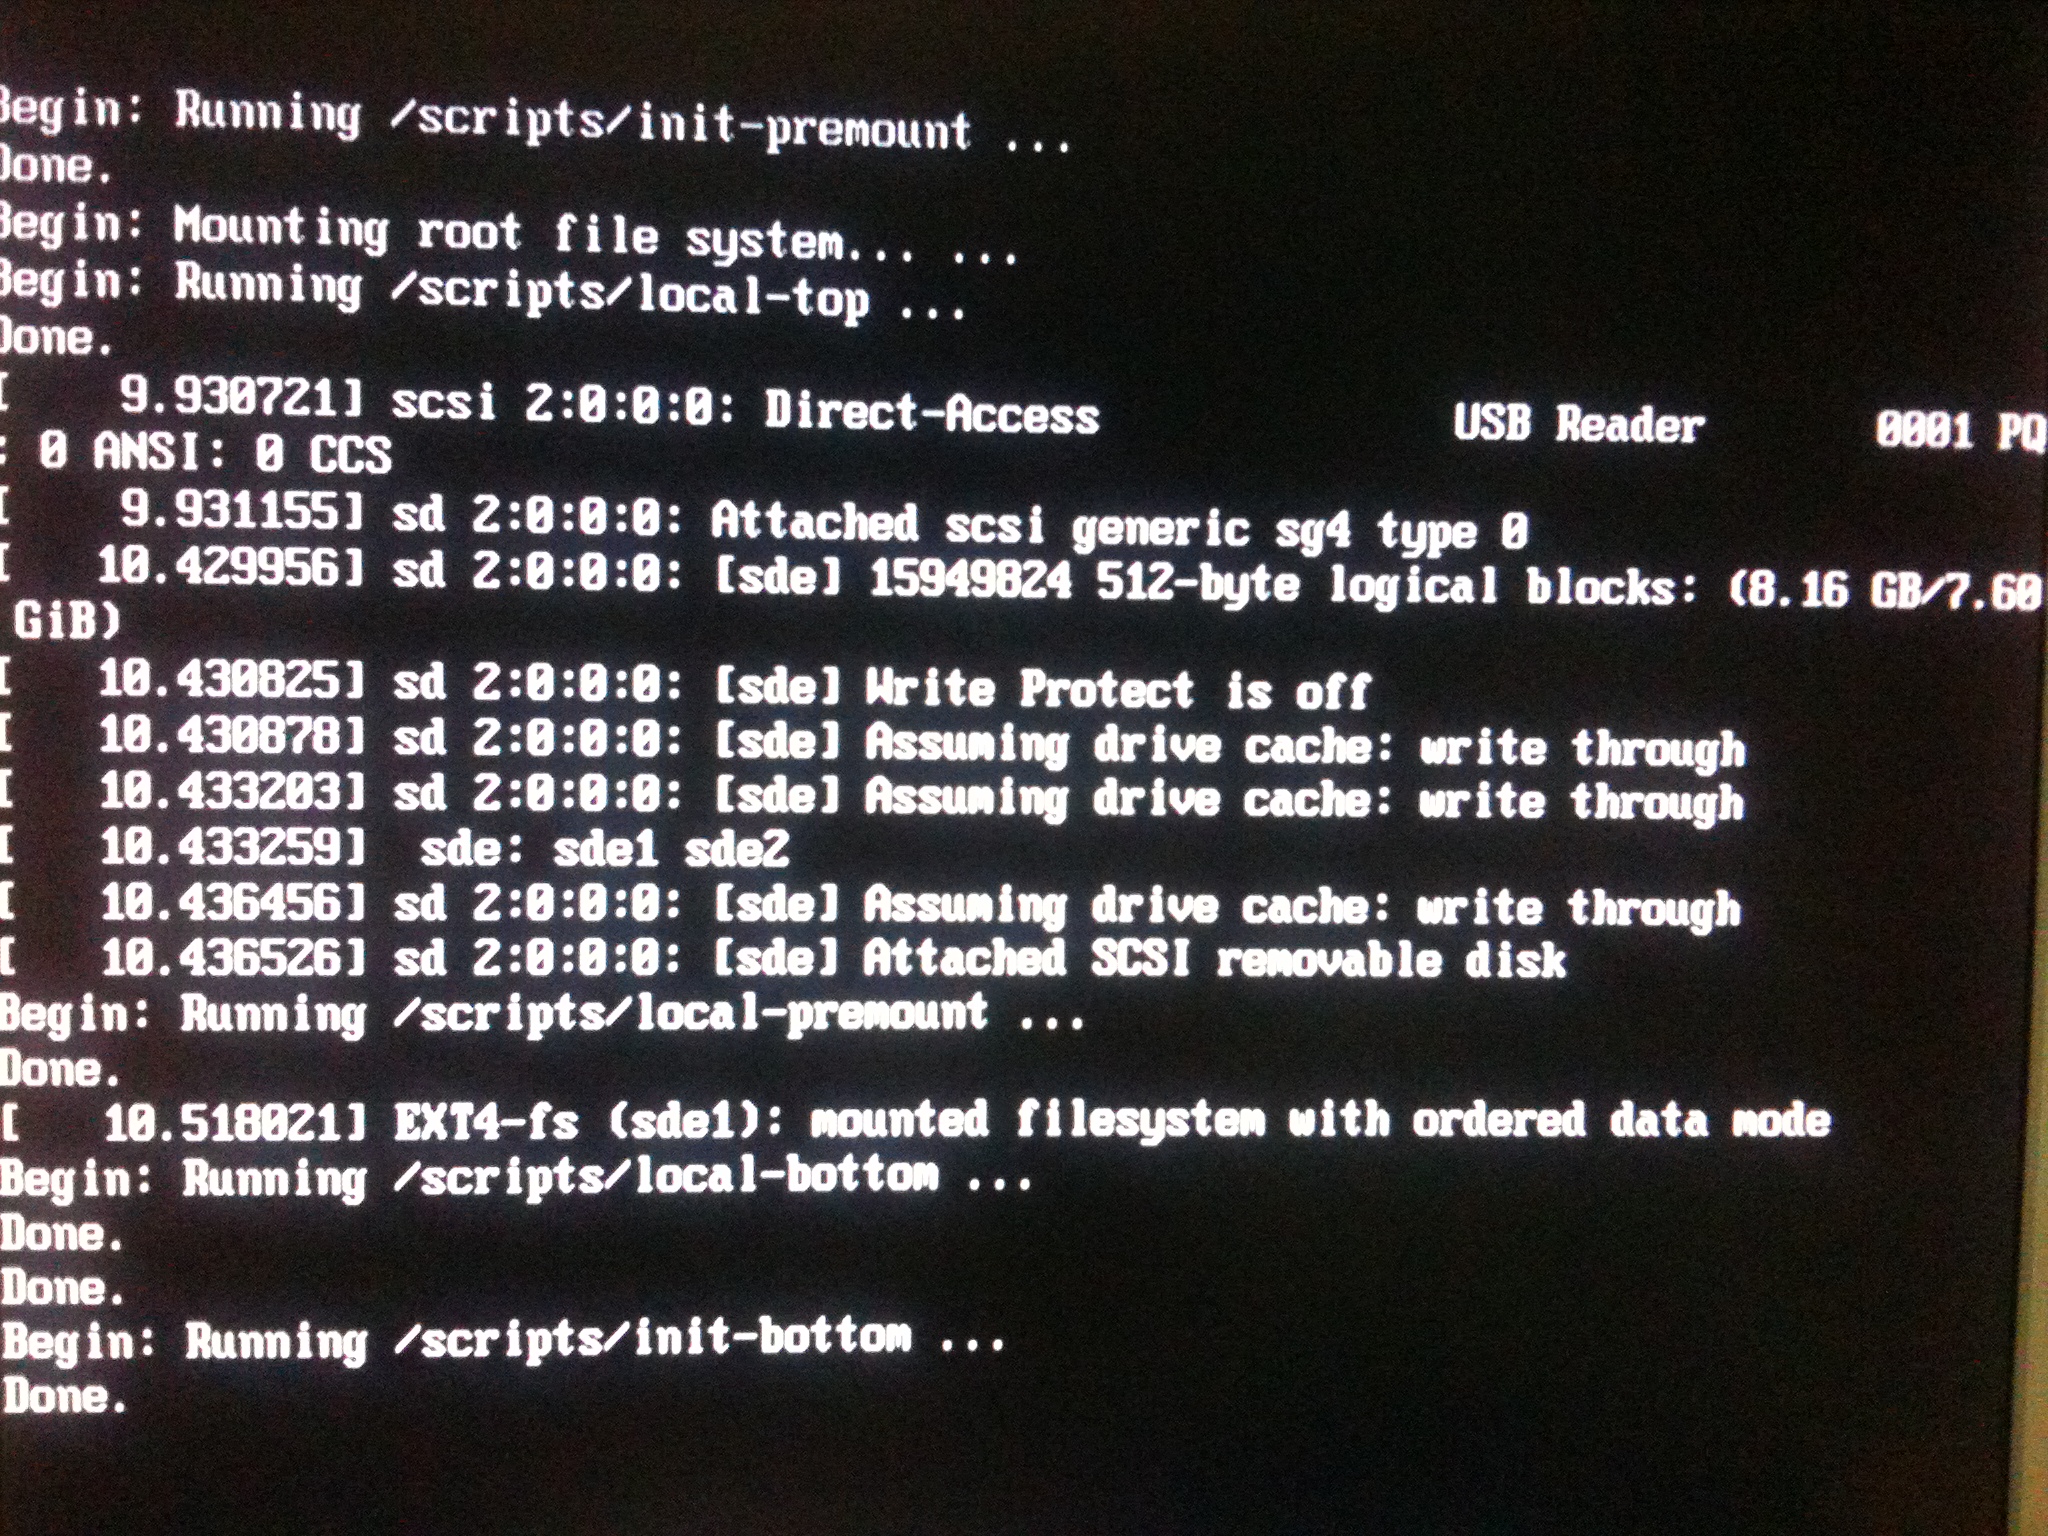
USBメモリからLinuxをインストールするとき [Linux コマンド・設定 Memo]

Macでは、まずISOファイルをISOファイルをdmgファイルに変換する
 
$ sudo hdiutil convert -format UDRW -o ./debian-7.0.0-amd64-CD-1 ./debian-7.0.0-amd64-CD-1.iso
 
これで、debian-7.0.0-amd64-CD-1.dmgファイルができあがる
 
USBメモリのデバイスとマウント状況を調べ、mountされているようなら、unmountしておく
 
$ sudo dd if=./debian-7.0.0-amd64-CD-1.dmg of=/dev/disk1 bs=1m 

Write Backモードの設定と取り消し [Linux コマンド・設定 Memo]


# tune2fs -o journal_data_writeback /dev/sda1
でwritebackモードに変更
 
fstabに追加する
/dev/sda1  /  ext4  errors=remount-ro,data=writeback  0  1 
 
# tune2fs -o ^journal_data_writeback /dev/sda1 
でwritebackモードを取り消し (のはず)

Advanced format対応のパーティショニング [Linux コマンド・設定 Memo]

2048sから始めるとalignするらしい。

 # parted

GNU Parted 2.3

Using /dev/sda

Welcome to GNU Parted! Type 'help' to view a list of commands.

(parted) print                                                            

Model: ATA ST3000DM001-1CH1 (scsi)

Disk /dev/sda: 3001GB

Sector size (logical/physical): 512B/4096B

Partition Table: gpt


Number  Start   End     Size    File system  Name  Flags

 1      1049kB  2996GB  2996GB  fat32              raid

 2      2996GB  3001GB  4593MB                     raid


(parted) unit s                                                           

(parted) print                                                            

Model: ATA ST3000DM001-1CH1 (scsi)

Disk /dev/sda: 5860533168s

Sector size (logical/physical): 512B/4096B

Partition Table: gpt


Number  Start        End          Size         File system  Name  Flags

 1      2048s        5851561983s  5851559936s  fat32              raid

 2      5851561984s  5860533134s  8971151s                        raid 


サービスの自動起動・自動起動停止についてのメモ [Linux コマンド・設定 Memo]

Debianで、 Netatalkを自動起動にしたい場合は
# update-rc.d netatalk defaults
 
自動起動を止めたい場合は
# update-rc.d -f netatalk remove
 
/etc/init.dの下にある、スクリプトの名前をつかう。

apt-cache コマンド [Linux コマンド・設定 Memo]

インストールされているパッケージのバージョンや依存関係を知りたい時に利用します。

便利。

# apt-cache show avahi-daemon

Package: avahi-daemon
Priority: optional
Section: net
Installed-Size: 400
Maintainer: Ubuntu Developers <ubuntu-devel-discuss@lists.ubuntu.com>
Original-Maintainer: Utopia Maintenance Team <pkg-utopia-maintainers@lists.alioth.debian.org>
Architecture: amd64
Source: avahi
Version: 0.6.25-1ubuntu6.2
Depends: libavahi-common3 (>= 0.6.16), libavahi-core6 (>= 0.6.24), libc6 (>= 2.4), libcap2 (>= 2.10), libdaemon0 (>= 0.12), libdbus-1-3 (>= 1.1.1), libexpat1 (>= 1.95.8), upstart-job, adduser, dbus (>= 1.2.16-0ubuntu3), lsb-base (>= 3.0-6), bind9-host | host
Recommends: libnss-mdns
Suggests: avahi-autoipd
Filename: pool/main/a/avahi/avahi-daemon_0.6.25-1ubuntu6.2_amd64.deb
Size: 65204
MD5sum: 9d3449a755bb55700464eb0db478df5a
SHA1: 23e4310fddacc5707d9ca52c4c4e221e7887c069
SHA256: d3538191f5ae0dbfe76a0de4f02b74c1450b410a007e8a5030ebbbc93447eaa6
Description: Avahi mDNS/DNS-SD daemon
 Avahi is a fully LGPL framework for Multicast DNS Service Discovery.
 It allows programs to publish and discover services and hosts
 running on a local network with no specific configuration.  For
 example you can plug into a network and instantly find printers to
 print to, files to look at and people to talk to.
 .
 This package contains the Avahi Daemon which represents your machine
 on the network and allows other applications to publish and resolve
 mDNS/DNS-SD records.
Origin: Ubuntu
Supported: 5y
Task: ubuntu-desktop, eucalyptus-cloud, eucalyptus-cluster, eucalyptus-node, eucalyptus-storage, eucalyptus-walrus, print-server, kubuntu-desktop, kubuntu-netbook, edubuntu-desktop, xubuntu-desktop, ubuntu-netbook

Package: avahi-daemon
Priority: optional
Section: net
Installed-Size: 392
Maintainer: Ubuntu Core Developers <ubuntu-devel-discuss@lists.ubuntu.com>
Original-Maintainer: Utopia Maintenance Team <pkg-utopia-maintainers@lists.alioth.debian.org>
Architecture: amd64
Source: avahi
Version: 0.6.25-1ubuntu6
Depends: libavahi-common3 (>= 0.6.16), libavahi-core6 (>= 0.6.24), libc6 (>= 2.4), libcap2 (>= 2.10), libdaemon0 (>= 0.12), libdbus-1-3 (>= 1.1.1), libexpat1 (>= 1.95.8), upstart-job, adduser, dbus (>= 1.2.16-0ubuntu3), lsb-base (>= 3.0-6), bind9-host | host
Recommends: libnss-mdns
Suggests: avahi-autoipd
Filename: pool/main/a/avahi/avahi-daemon_0.6.25-1ubuntu6_amd64.deb
Size: 64914
MD5sum: 9f4bb4b08a4c427899b648d7ef5922d7
SHA1: 148bbacf83e21d716250f9524e9e369b5c98e3c5
SHA256: ce31df3aa3d7d383c74ec57ae50e6dde6c73c1360789e72366d3b84d9c723076
Description: Avahi mDNS/DNS-SD daemon
 Avahi is a fully LGPL framework for Multicast DNS Service Discovery.
 It allows programs to publish and discover services and hosts
 running on a local network with no specific configuration.  For
 example you can plug into a network and instantly find printers to
 print to, files to look at and people to talk to.
 .
 This package contains the Avahi Daemon which represents your machine
 on the network and allows other applications to publish and resolve
 mDNS/DNS-SD records.
Origin: Ubuntu
Supported: 5y
Task: ubuntu-desktop, eucalyptus-cloud, eucalyptus-cluster, eucalyptus-node, eucalyptus-storage, eucalyptus-walrus, print-server, kubuntu-desktop, kubuntu-netbook, edubuntu-desktop, xubuntu-desktop, ubuntu-netbook


Linuxサーバーの不要なファイルを削除する [Linux コマンド・設定 Memo]

気がつくといつの間にか肥えている。。。よくあることです[たらーっ(汗)]
Linuxのサーバーのことですが、apt-get upgradeとかなんとかで気がつくと、数GBも肥えていることもよくあります。
そこで、ダイエット。

まずどこ贅肉が付いているのかを絞り込みます。
そんな時には、duコマンドがきっと便利。特定のディレクトリ内のファイルサイズを教えてくれます。

# du -sh /*
# du -sh /*
7.7M /bin
243M /boot
4.0K /cdrom
4.0K /default
208K /dev
4.9M /etc
449M /home
0 /initrd.img
0 /initrd.img.old
1.9G /lib
0 /lib64
16K /lost+found
8.0K /media
4.0K /mnt
4.0K /opt
56K /root
7.1M /sbin
4.0K /selinux
4.0K /srv
2.2T /st1
0 /sys
4.0K /tmp
1.8G /usr
277M /var
0 /vmlinuz
0 /vmlinuz.old

この結果から、/libと/usrについていそうな予感。

さらに、

# du -sh /lib/*

(略)
1.8G /lib/modules
(略)

の結果から、どうもここが怪しい。

# du -sh /lib/modules/*
111M /lib/modules/2.6.32-21-server
111M /lib/modules/2.6.32-22-server
114M /lib/modules/2.6.32-24-server
114M /lib/modules/2.6.32-26-server
114M /lib/modules/2.6.32-27-server
114M /lib/modules/2.6.32-28-server
114M /lib/modules/2.6.32-29-server
114M /lib/modules/2.6.32-30-server
114M /lib/modules/2.6.32-32-server
114M /lib/modules/2.6.32-33-server
114M /lib/modules/2.6.32-34-server
114M /lib/modules/2.6.32-35-server
114M /lib/modules/2.6.32-36-server
114M /lib/modules/2.6.32-37-server
114M /lib/modules/2.6.32-38-server
114M /lib/modules/2.6.32-39-server

おっと。貯めこんでました。
もちろん、必要な方はそのままで。
でも現状そのマシンで動いているカーネルバージョンのライブラリ以外は必要ないはず。
というわけで、不要なモジュールライブラリを消し去りましょう♪

また、同様に、

# du -sh /usr/*
35M /usr/bin
4.0K /usr/games
17M /usr/include
140M /usr/lib
0 /usr/lib64
281M /usr/local
7.9M /usr/sbin
200M /usr/share
1.2G /usr/src

から、/usr/src のダイエット。

# du -sh /usr/src/*
73M /usr/src/linux-headers-2.6.32-24
8.9M /usr/src/linux-headers-2.6.32-24-server
73M /usr/src/linux-headers-2.6.32-26
8.8M /usr/src/linux-headers-2.6.32-26-server
73M /usr/src/linux-headers-2.6.32-27
8.8M /usr/src/linux-headers-2.6.32-27-server
73M /usr/src/linux-headers-2.6.32-28
8.8M /usr/src/linux-headers-2.6.32-28-server
73M /usr/src/linux-headers-2.6.32-29
8.8M /usr/src/linux-headers-2.6.32-29-server
73M /usr/src/linux-headers-2.6.32-30
8.8M /usr/src/linux-headers-2.6.32-30-server
73M /usr/src/linux-headers-2.6.32-32
8.8M /usr/src/linux-headers-2.6.32-32-server
73M /usr/src/linux-headers-2.6.32-33
8.9M /usr/src/linux-headers-2.6.32-33-server
73M /usr/src/linux-headers-2.6.32-34
8.8M /usr/src/linux-headers-2.6.32-34-server
73M /usr/src/linux-headers-2.6.32-35
8.8M /usr/src/linux-headers-2.6.32-35-server
73M /usr/src/linux-headers-2.6.32-36
8.8M /usr/src/linux-headers-2.6.32-36-server
73M /usr/src/linux-headers-2.6.32-37
8.8M /usr/src/linux-headers-2.6.32-37-server
73M /usr/src/linux-headers-2.6.32-38
8.8M /usr/src/linux-headers-2.6.32-38-server
73M /usr/src/linux-headers-2.6.32-39
8.8M /usr/src/linux-headers-2.6.32-39-server

こっちも貯めこんでました。
不要なヘッダファイルを消し去ります。

さいごに
# apt-get autoremove

今回のダイエットで、3GB以上のダイエットに成功しました!


MIBシンボル名をOIDに変換する。 [Linux コマンド・設定 Memo]


# snmptranslate -On DISMAN-EVENT-MIB::sysUpTimeInstance

.1.3.6.1.2.1.1.3.0

こんな具合で。

逆は

# snmptranslate .1.3.6.1.2.1.1.3.0

DISMAN-EVENT-MIB::sysUpTimeInstance

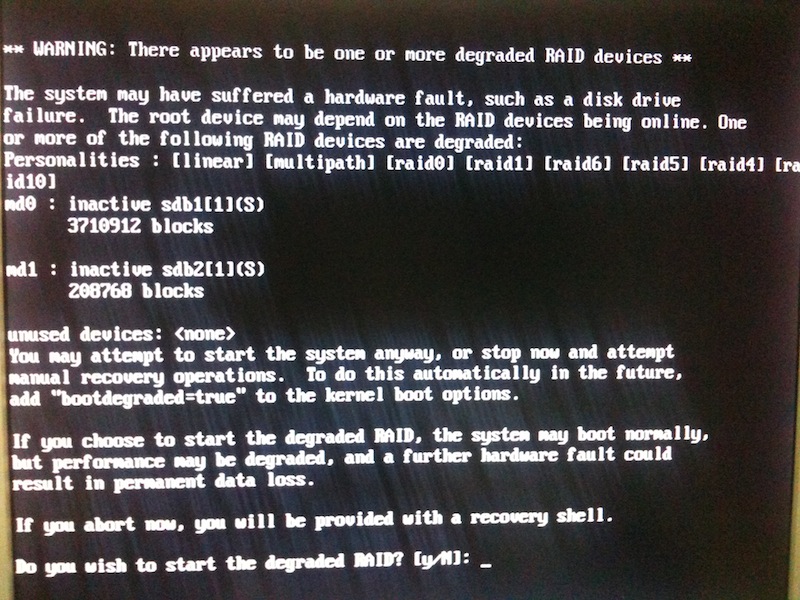
起動の状況を表示したり [Linux コマンド・設定 Memo]

Ubuntu 10.04はたしかに起動が速い。

あっという間に起動するのですが、昔みたいに起動の状況が見えない。
これはいつの頃からこうなったか知らないのですが、ちょっと不便。

という訳で、起動の状況が見えるように。

# vi /etc/default/grub

して、

GRUB_CMDLINE_LINUX_DEFAULT="quiet"


GRUB_CMDLINE_LINUX_DEFAULT="quiet nosplash"

または

GRUB_CMDLINE_LINUX_DEFAULT="text"

とすればよいようです。

そして、

# update-grub

ただし、

GRUB_CMDLINE_LINUX_DEFAULT="text"

とした場合はテキストログインになるようです。

最近はランレベルという概念は互換性のために残されているだけで、
grubでログイン方法を指定するのが作法だとか。


ま、入っているubuntuはもともとserver版でテキストログインなので、
どっちでも結果は同じなので、"text"で指定して、再起動。

IMG_2091.JPG

無事、昔ながらなかんじになりました。

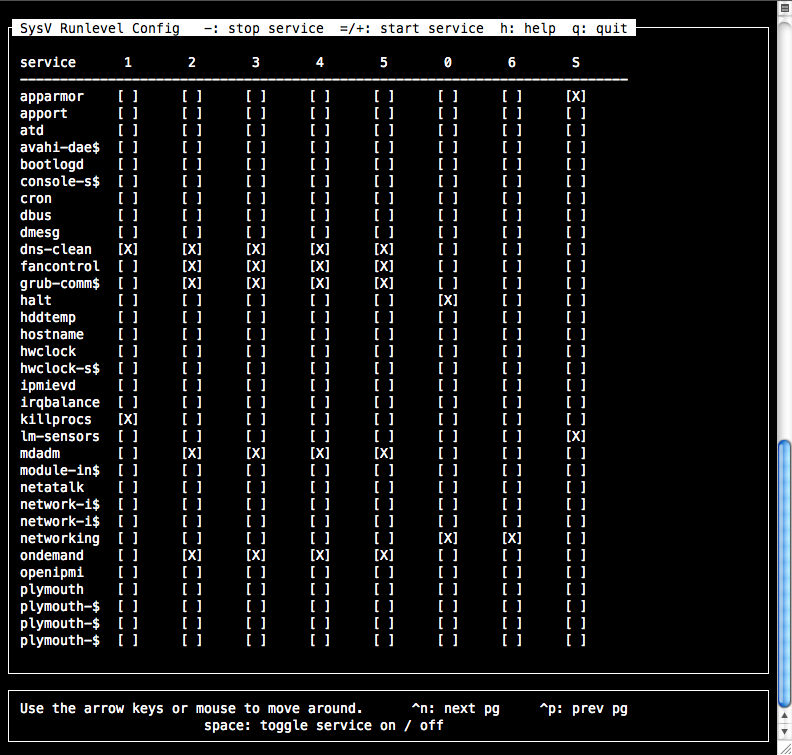
今更ながら、、便利な sysv-rc-conf [Linux コマンド・設定 Memo]


ubuntuでは init.d から upstart へ移行しようとしているさなか、
本当に今更ながらですが、sysv-rc-conf を初めて使いました。

サービスのon/offを簡単に設定できる上、一覧で確認できるため
視覚的にも、便利です。

スクリーンショット(2010-05-16 23.32.25).png

なんで今まで使っていなかったのかしら?

コマンドって一度使い込むと、新しいコマンドを覚えるのが億劫になる。
きっとそんな悪循環5年くらい経て、やっと覚えたら(今)、そんなの
もう化石ってことに。。

ubuntu のアップグレードを行う [Linux コマンド・設定 Memo]

5月5日に ubuntu 10.04 がリリースされましたので、
今まで使っている 9.10 からアップグレードします。

といっても、コマンド一つ です。


# do-release-upgrade

あとは、ひたすら、y で終わりです。。

(以下レスポンスの一部)
Checking for a new ubuntu release
Done Upgrade tool signature
Done Upgrade tool
Done downloading            
extracting 'lucid.tar.gz'
authenticate 'lucid.tar.gz' against 'lucid.tar.gz.gpg' 
tar: Removing leading `/' from member names

Reading cache

Checking package manager

Continue running under SSH? 

This session appears to be running under ssh. It is not recommended 
to perform a upgrade over ssh currently because in case of failure it 
is harder to recover. 

If you continue, an additional ssh daemon will be started at port 
'9004'. 
Do you want to continue? 

Continue [yN] y

Starting additional sshd 

To make recovery in case of failure easier, an additional sshd will 
be started on port '9004'. If anything goes wrong with the running 
ssh you can still connect to the additional one. 


Reading package lists: Done
Reading state information: Done
Done downloading            
Reading package lists: Done
Reading state information: Done

Updating repository information
WARNING: Failed to read mirror file
Done downloading            

Checking package manager
Reading package lists: Donelucid-security/multiverse Packages: 98   
Reading state information: Done

Calculating the changes

Calculating the changes

Support for some applications ended 

Canonical Ltd. no longer provides support for the following software 
packages. You can still get support from the community. 

Demoted: 
libcompress-bzip2-perl, netcat-traditional 


Do you want to start the upgrade? 


3 packages are going to be removed. 47 new packages are going to be 
installed. 373 packages are going to be upgraded. 

You have to download a total of 233M. This download will take about 2 
minutes with your connection. 

Fetching and installing the upgrade can take several hours. Once the 
download has finished, the process cannot be cancelled. 

 Continue [yN]  Details [d]y

途中、grubのインストール先を聞かれます。

 ┌─────────┤ Configuring grub-pc ├──────────┐  
 
The grub-pc package is being upgraded.  
This menu allows you to select which devices you'd 
like grub-install to be automatically run for, if any. 

It is recommended that you do this in most situations, 
to prevent the installed GRUB from getting out of sync 
with other components such as grub.cfg or with newer 
Linux images it  will have to load. 

 If you're unsure which drive is designated as boot 
drive by your BIOS, it is often a good idea to install 
GRUB to all of them.

Note: It is possible to install GRUB to partition boot 
records as well. However, this forces GRUB to use the
 blocklist mechanism, which makes it less reliable, 
and therefore is not recommended.  

GRUB install devices:   

    [ ] /dev/sda (2000398 MB, Hitachi_HDS722020ALA330)   
    [ ] - /dev/sda1 (2000398 MB)  
    [ ] /dev/sdb (2000398 MB, Hitachi_HDS722020ALA330)  
    [ ] - /dev/sdb1 (2000398 MB)   
    [ ] /dev/sdc (2000398 MB, Hitachi_HDS722020ALA330)  
    [ ] - /dev/sdc1 (2000398 MB)   
    [ ] /dev/sdd (2000398 MB, Hitachi_HDS722020ALA330)  
    [ ] - /dev/sdd1 (2000398 MB)   
    [*] /dev/sde (8166 MB, USB_Reader)  
    [ ] - /dev/sde1 (7800 MB)   
    [ ] - /dev/sde2 (366 MB)  
 
 
                                            <Ok>   
───────────────────────────────────────────


再起動して、完了です[ぴかぴか(新しい)]

これで、zabbixが1.6.4から1.8.1へ
その他もろもろアップデートされました〜


du -sh * [Linux コマンド・設定 Memo]

頻繁に使うコマンドはオプションまで覚えていても、
たまに使うコマンドはよく忘れて、調べなきゃっ[あせあせ(飛び散る汗)]ていうこともしばしば。。
そこで、調べたコマンドをメモっておくことに。

du -sh *:今いる場所にあるディレクトリごとの容量を適切な単位で出力

# du -sh *
90M bin
24K games
16M include
136M lib
80K lib32
0 lib64
1.3G local
34M sbin
284M share
78M src


ddコマンドでディスクまるごとコピー [Linux コマンド・設定 Memo]

そう、少し前まで、ファイルサーバーの/ディレクトリのディスクは
USBメモリを2つ使ってRAID1を組んでいたのですが、起動時に

IMG_1045.JPG

こんなことを言われることが頻繁におこり、でも実際はdegradeしてない
という意味不明な状況だったりして、むむむな状態にしびれを切らして、
RAIDはやめて、USBメモリをちょくちょくもう一つのUSBメモリに
コピーすればいいじゃないですか。。
という訳で、早速コピーしてみました[るんるん]

# dd if=/dev/sdb of=/dev/sdd

ifでコピー元
ofでコピー先
のUSBメモリを指定します。
# おわかりの通り、逆にすると悲惨なことになりますので、ご注意を[あせあせ(飛び散る汗)]

8GBのUSBメモリですが、転送速度が遅いので、それなりに時間が
かかります。

コピーが完了すると、

15949824+0 records in
15949824+0 records out
8166309888 bytes (8.2 GB) copied, 1741.72 s, 4.7 MB/s

などと表示されます。

これで、コピー完了[exclamation]

USBメモリを差し替えて、起動してみます。
OK[ぴかぴか(新しい)]
ちゃんと起動しました。

今回は起動中のUSBメモリから空のUSBメモリへコピーしました。
完全にコピーするなら、起動中のubuntuを一度終了させて、
他のddコマンドが使えるOSで二つのUSBメモリを認識させて、
コピーするのがいいのでしょうが、、、面倒なので[たらーっ(汗)]

ま、動いたので、これで良しとしましょう[揺れるハート]


ubuntu9.10 に webminをいれてみる [Linux コマンド・設定 Memo]

最近のディストリビューションはどこでなんの設定が
なされているか昔とさっぱり違い戸惑うこともあるので、
webminとかいれてみたりします。

さっそく、

入れてみます、
# dpkg -i webmin_1.500_all.deb 
(Reading database ... 47896 files and directories currently installed.)
Preparing to replace webmin 1.500 (using webmin_1-1.500_all.deb) ...
Unpacking replacement webmin ...
dpkg: dependency problems prevent configuration of webmin:
 webmin depends on libnet-ssleay-perl; however:
  Package libnet-ssleay-perl is not installed.
 webmin depends on libauthen-pam-perl; however:
  Package libauthen-pam-perl is not installed.
 webmin depends on libio-pty-perl; however:
  Package libio-pty-perl is not installed.
 webmin depends on libmd5-perl; however:
  Package libmd5-perl is not installed.
dpkg: error processing webmin (--install):
 dependency problems - leaving unconfigured
Errors were encountered while processing:
 webmin

いろいろ足りないといわれましたので、
# apt-get -f install
Reading package lists... Done
Building dependency tree       
Reading state information... Done
Correcting dependencies... Done
The following packages were automatically installed and are no longer required:
  binutils-static
Use 'apt-get autoremove' to remove them.
The following extra packages will be installed:
  libauthen-pam-perl libio-pty-perl libmd5-perl libnet-ssleay-perl
The following NEW packages will be installed:
  libauthen-pam-perl libio-pty-perl libmd5-perl libnet-ssleay-perl
0 upgraded, 4 newly installed, 0 to remove and 0 not upgraded.
1 not fully installed or removed.
Need to get 286kB of archives.
After this operation, 1,380kB of additional disk space will be used.
Do you want to continue [Y/n]? y
Get:1 http://jp.archive.ubuntu.com karmic/universe libnet-ssleay-perl 1.35-2ubuntu1 [204kB]
Get:2 http://jp.archive.ubuntu.com karmic/universe libauthen-pam-perl 0.16-1.1 [33.0kB]
Get:3 http://jp.archive.ubuntu.com karmic/main libio-pty-perl 1:1.07-2 [42.5kB]
Get:4 http://jp.archive.ubuntu.com karmic/universe libmd5-perl 2.03-1 [5,680B]
Fetched 286kB in 0s (839kB/s)      
Selecting previously deselected package libnet-ssleay-perl.
(Reading database ... 47896 files and directories currently installed.)
Unpacking libnet-ssleay-perl (from .../libnet-ssleay-perl_1.35-2ubuntu1_i386.deb) ...
Selecting previously deselected package libauthen-pam-perl.
Unpacking libauthen-pam-perl (from .../libauthen-pam-perl_0.16-1.1_i386.deb) ...
Selecting previously deselected package libio-pty-perl.
Unpacking libio-pty-perl (from .../libio-pty-perl_1%3a1.07-2_i386.deb) ...
Selecting previously deselected package libmd5-perl.
Unpacking libmd5-perl (from .../libmd5-perl_2.03-1_all.deb) ...
Processing triggers for man-db ...
Setting up libnet-ssleay-perl (1.35-2ubuntu1) ...
Setting up libauthen-pam-perl (0.16-1.1) ...
Setting up libio-pty-perl (1:1.07-2) ...
Setting up libmd5-perl (2.03-1) ...
Setting up webmin (1.500) ...
Webmin install complete. You can now login to https://ss:10000/
as root with your root password, or as any user who can use sudo
to run commands as root.


これで無事アクセスできました♪

Linux コマンド・設定 Memo ブログトップ

この広告は前回の更新から一定期間経過したブログに表示されています。更新すると自動で解除されます。